
Securing REST API’s is something we all must learn to do. After all, releasing an API into the wild without some precautions is downright foolhardy. Still, I remember when I was trying to learn to do this and I remember it seemed like a steep learning curve, for sure. Back then, it seemed to me that everything written on the topic was either too complicated, or incomplete, or mixed in with a bunch of unrelated topics. What I wanted, back then, was a simple, clear cut guide to securing a REST API. So, since I couldn’t find it then, I thought I would write it now – or try to, at any rate.
My project source code is located HERE.
Let’s start by creating a simple .NET based project to work with. For my part, I typically start with a Blazor project, since I’m more comfortable with Blazor than I am with MVC. Either one will work in this case though.
The first thing I did was hit Ctrl+Shift+N to start a new project:
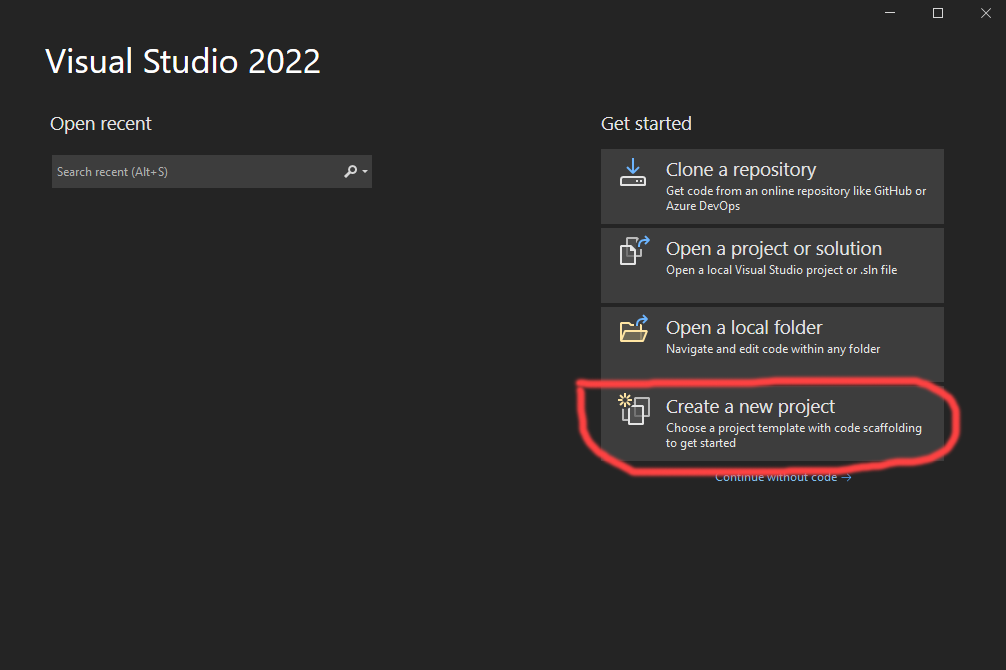
Then I chose the “Create a new project” option:
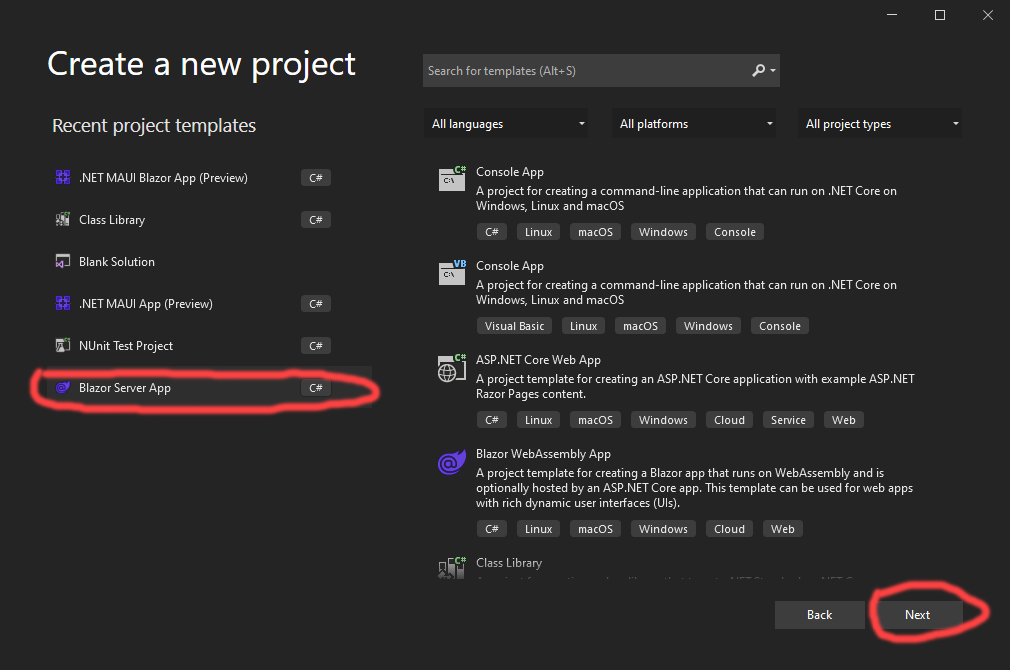
Then I selected the server side Blazor template, and pressed the “Next” button:
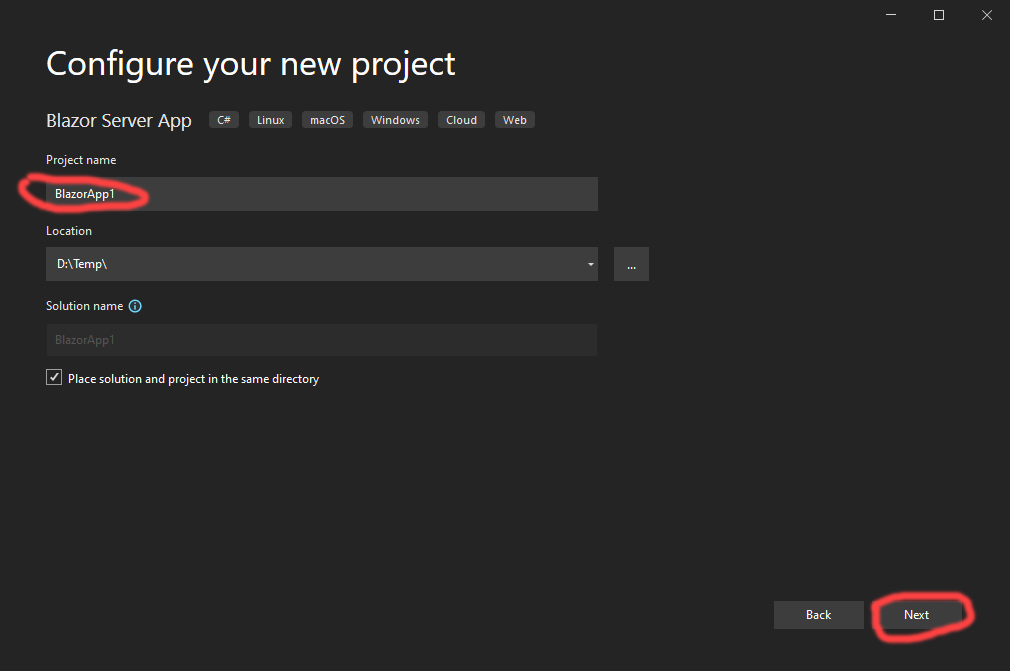
Then I chose a name for my application, and hit the “Next” button again:
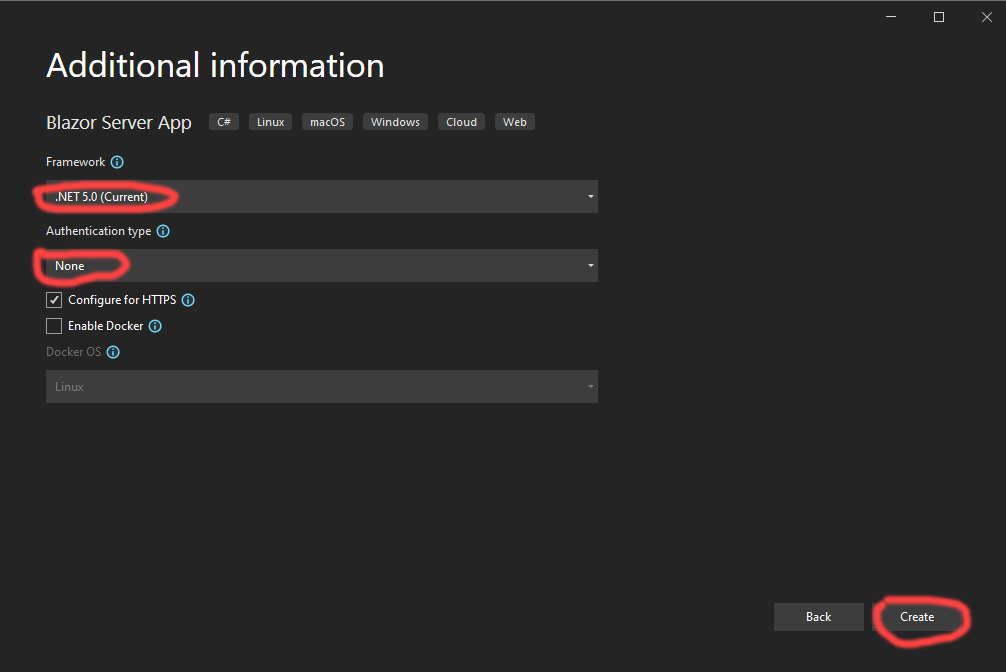
Then I selected the .NET 5.0 runtime. I chose no pre-built authentication, since we’re going to write our own authentication code for this article. I then pressed the “Create” button:
That resulted in the creation of a typical sever side Blazor project, in Visual Studio.
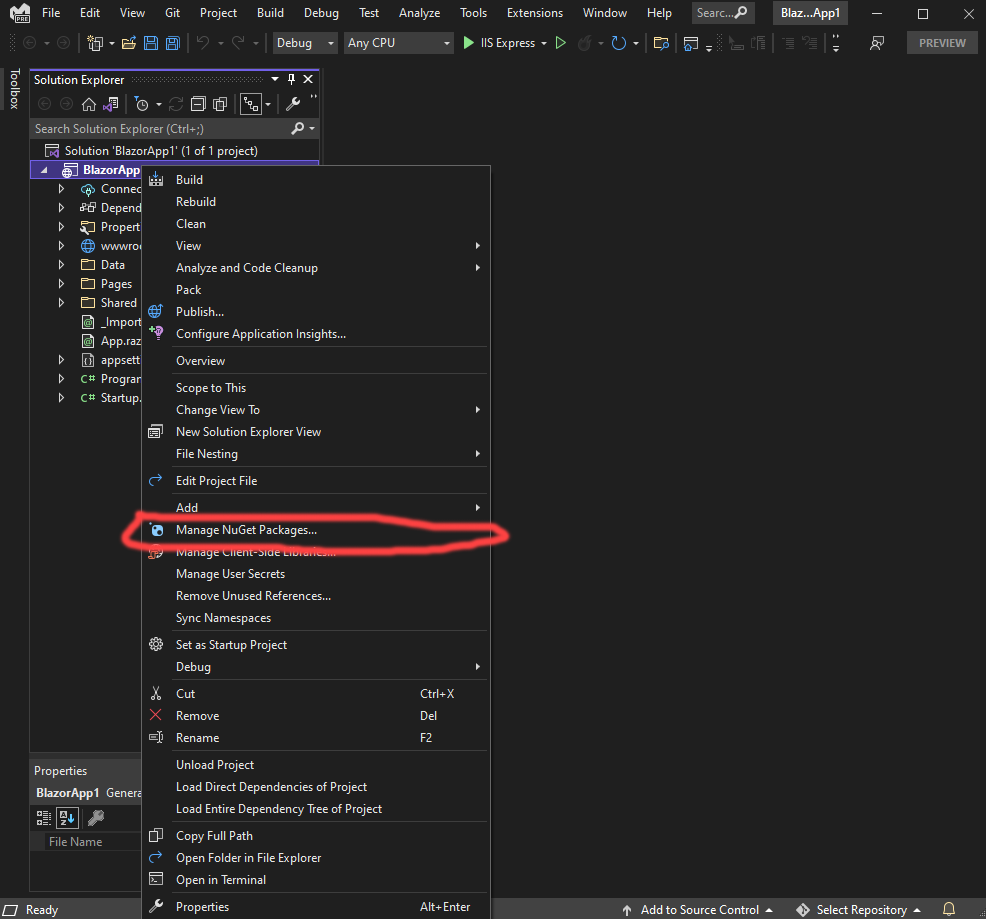
Now we’re ready to start adding our custom changes to the project. Let’s start by adding the NuGet package we’ll need. To do that, right click on the project in the Solution Explorer window, and select the “Manage NuGet Packages …” menu option:
That opens the NuGet manager, in Visual Studio:

Once you’re in the NuGet manager window, enter “Microsoft.AspNetCore.Authentication.JwtBearer in the search window, then select it in the list and hit the “Install” button.
Next, double click the Startup.cs file, in the Solution Explorer window, and add these lines of code:

This code is what tells .NET that we want to use an authentication scheme that’s based on JWT tokens. It is possible to mix this authentication scheme with others, for instance, with the normal pre-built ASP.NET authentication code, or even with 3rd party authentication libraries, but, I want to keep this article focused and simple, so, this is all we’re going to add.
What this code does, with the call to AddAuthentication, is tell .NET about an authentication scheme called JwtBearerDefaults.AuthenticationScheme – which, it just so happens, is a constant string that contains the word “Bearer”. By calling AddAuthentication this way, we’re telling .NET that whenever it needs to authenticate an HTTP call, with a “bearer” based authentication scheme, it should use the options we’ll set here to do so. Make sense?
So what’s the difference between a bearer token and a JWT token? Nothing, actually, at least for our purposes. JWT is just a standard way to secure information in a token. “Bearer” is just a phrase used to define an authentication scheme that uses JWT tokens to pass authentication information around. For our purposes, we can use either phrase, JWT, or Bearer token, and mean the same thing – we’re going to use JWT tokens to perform our authentication checks.
So, how will .NET know to use a JWT based authentication scheme for our controllers? I’ll cover that shortly. For now, let’s stay focused on what’s going on here. Notice that the next method we call is AddJwtBearer. That method is where we setup the actual bearer authentication. Luckily, ASP.NET already has this method, or we’d have to write it ourselves. As we see in the code, AddJwtBearer takes some options. These options are how our website will be able to identify JWT tokens that we can trust, versus those forged by some 14 year old with too much time on their hands. For this article, we’re passing these options in:
- ValidateIsssuer – which tells .NET that we want to make sure the issuer field, in the token matches a particular value.
- ValidateAudience – which tells .NET that we want to make sure the audience field, in the token, matches a particular value.
- ValidateIssuerSigningKey – which tells .NET that we want to make sure the signing key is valid, as part of the overall token check.
- ValidIssuer – which tells .NET what we consider a valid issuer to be.
- ValidAudience – which tells .NET what we consider a valid audience to be.
- IssuerSigningKey – which tells .NET what we consider a value signing key to be.
Obviously, some of these values are hard coded, and obviously, you wouldn’t want to do that in your code. I did that here to keep everything simple. In your project, pull the issuer, audience, and secret key for somewhere private and secure. Don’t leave it in your source code though, alright?
The next changes we need to make, to this Startup class, are shown here:

The call to UseAuthentication tells .NET that we want to use an authentication scheme.
The call to UseAuthorization tells .NET that we want to use an authorization scheme.
Both of these calls MUST be placed AFTER the call UseRouting. If you don’t do that, it won’t work, pure and simple.
The call to MapControllers doesn’t technically have anything to do with authentication, but, we’ll need it shortly for our REST controllers.
At this point we’re almost completely setup for our security. The only thing we lack are some REST controllers, so we’ll have something to secure. Let’s go add that next.
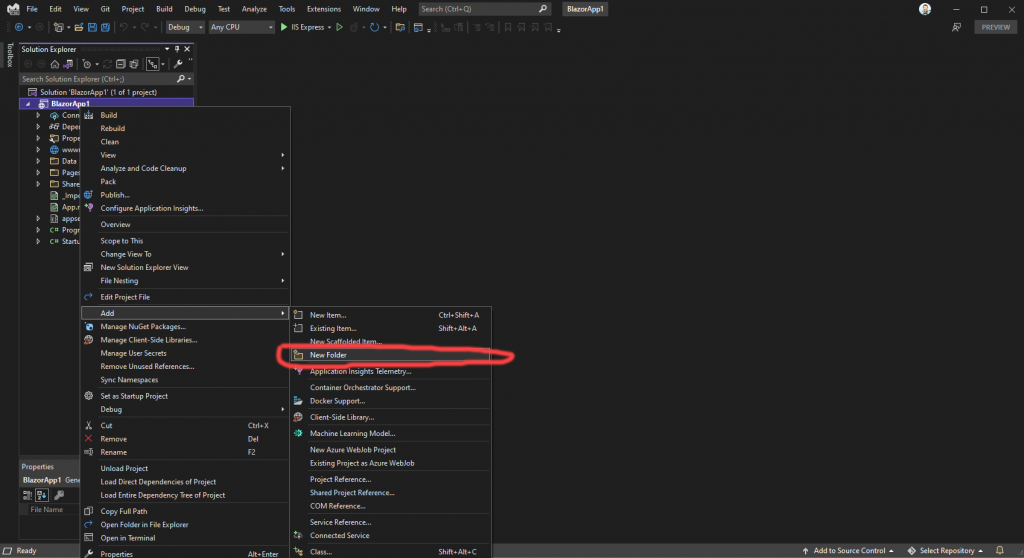
Right click on the project, in the Solution Explorer, then choose “Add”, and “New Folder”. Then, name your folder whatever you like. I’ll name mine Controllers:

Now, we can use the Visual Studio scaffolding to add our first REST controller. To do that, right click on the Controllers folder (or whatever you named yours) and choose the “Add” and then “Controller” options:

That will bring up a dialog like this:
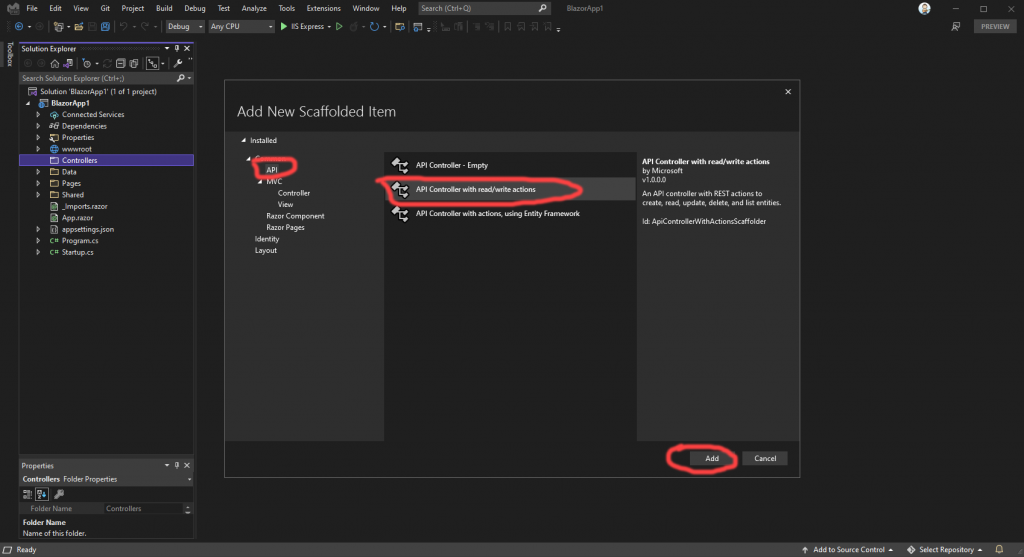
For our purposes, we want to select “API” in the list to the left, then select “API Controller with read/write actions” in the middle list, then press the “Add” button.

That brings us to another dialog with the “API Controller with read/write actions” option pre-selected. Leave that as it is. Also, for our purposes, the default name of “ValuesController.cs” is fine, so leave that as well. Press the “Add” button.
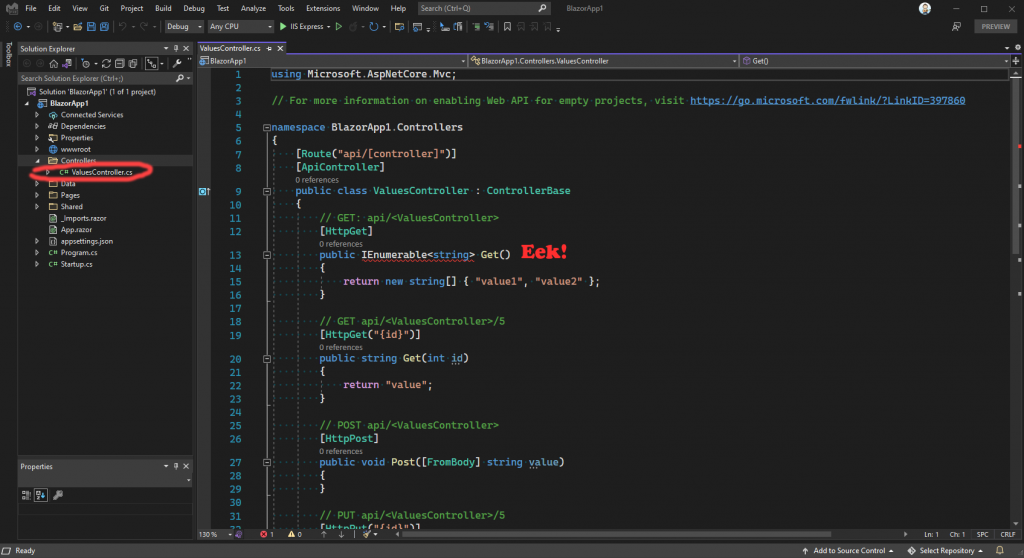
That creates our REST controller, in our Controllers folder. But wait! There’s an error in the template for this REST controller, so we’ll need to fix that now. Hover your mouse cursor over the red squiggly and it will show a lightbulb:
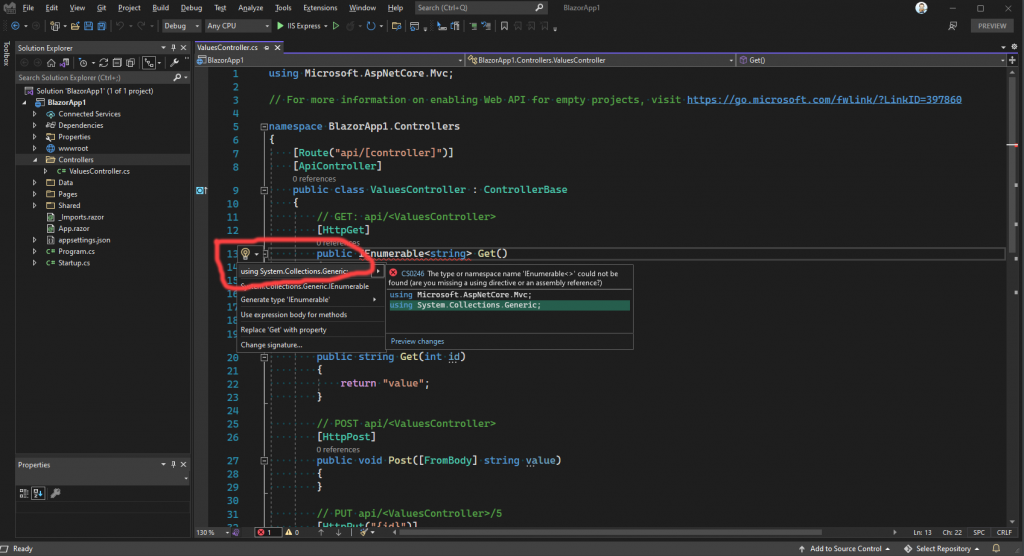
Press the dropdown arrow next to the lightbulb, and it will show a list of possible fixes. We want the first one, so select that to add the missing using statement.
At this point, we can do our first compile. Do that now by pressing the Ctrl+Shift+B keys. Everything should build. If not, go back over the steps and try to figure out where you got lost. If you can’t figure it out, I’ll publish my project in the article, so you can go look at that instead.
So, at this point, we have a server side Blazor application that is setup to use a Bearer token authentication scheme. We also have a REST controller, albeit not a terribly useful one, but that’s ok! Let’s run the project now and prove that we can navigate to our API:
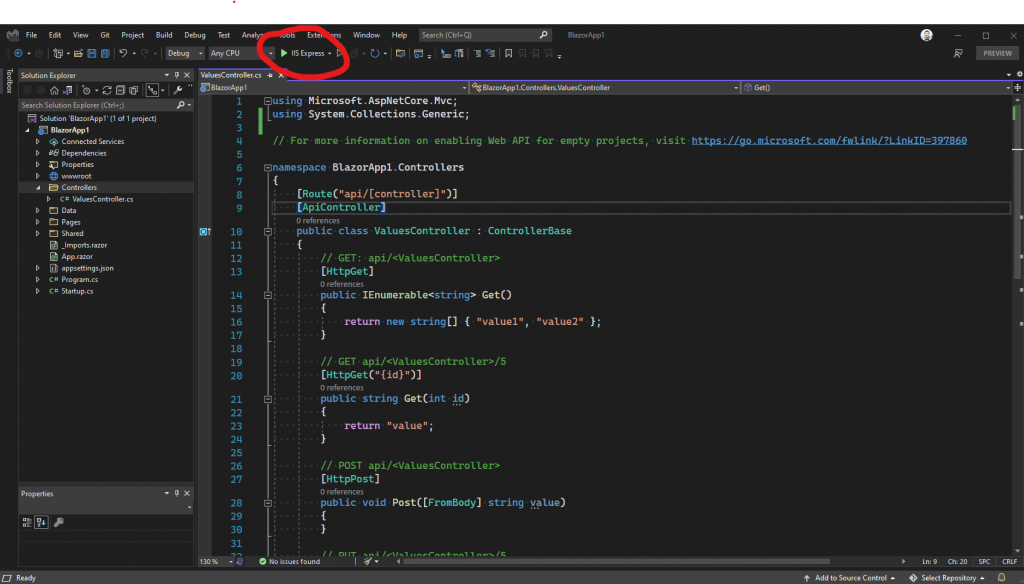
To do that, click the “IIS Express” button, at the top of Visual Studio. That brings up our main window:
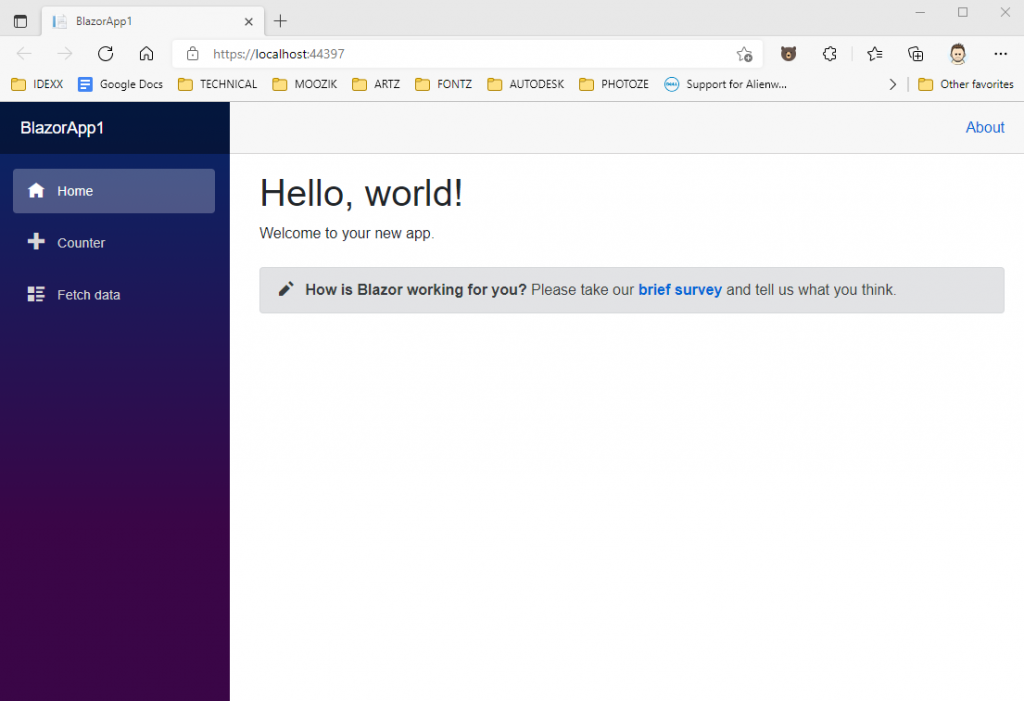
This is fine, in that it demonstrates that our website runs. Now, let’s prove that our REST controller functions by adding “/api/values” to the url, in the browser:
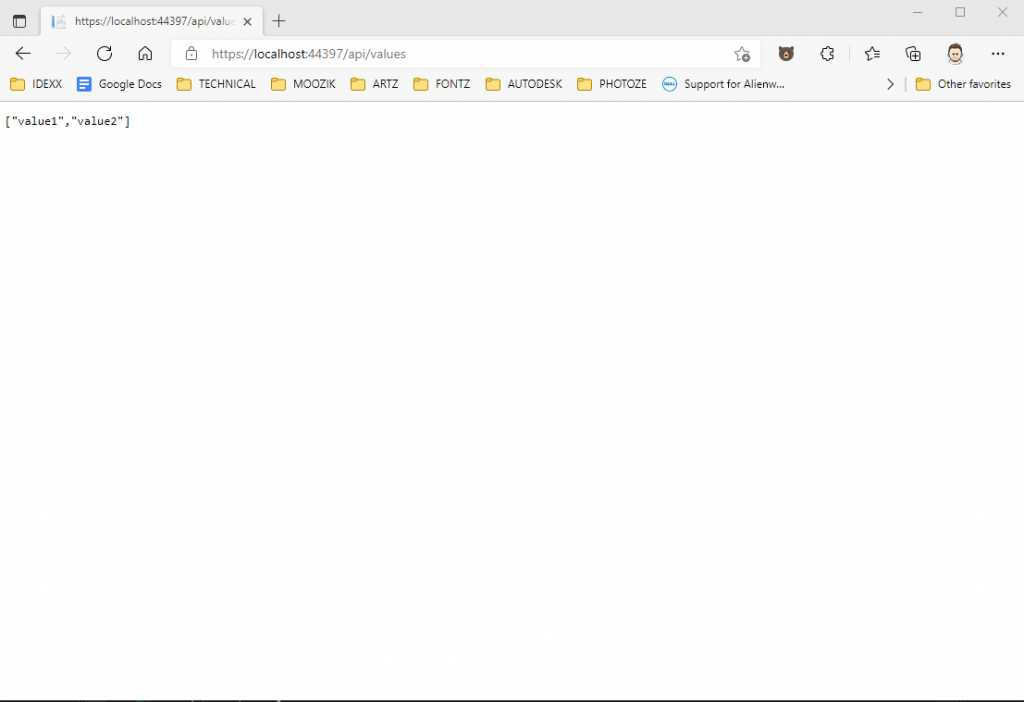
This is better, in that it demonstrates that our REST controller functions. Now, let’s secure that REST controller so we can control who gets to use it.
To do that, shut down the application and open the ValuesController.cs file, in the Controllers folder. Then, make these changes:
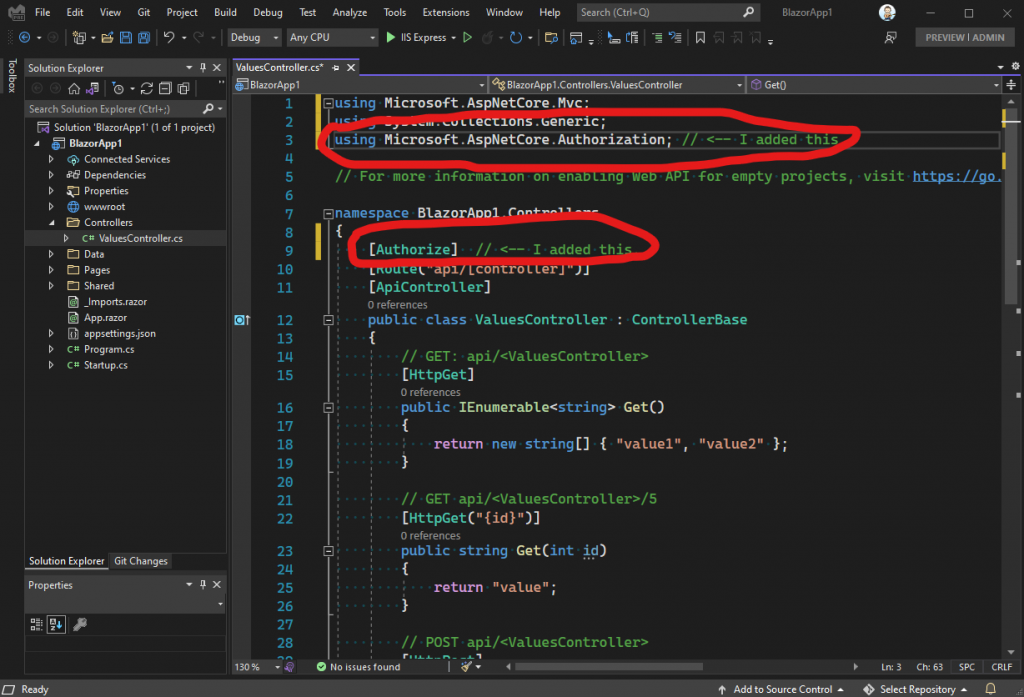
The magic, so to speak, is in the Authorize attribute that we added to the controller. That tells .NET to authenticate any incoming requests, for this controller. Now, since our example only has the one authentication scheme – the one we registered in Startup – it will all just work. If we wanted to be more specific, we could specify what authentication policy to us, like this:
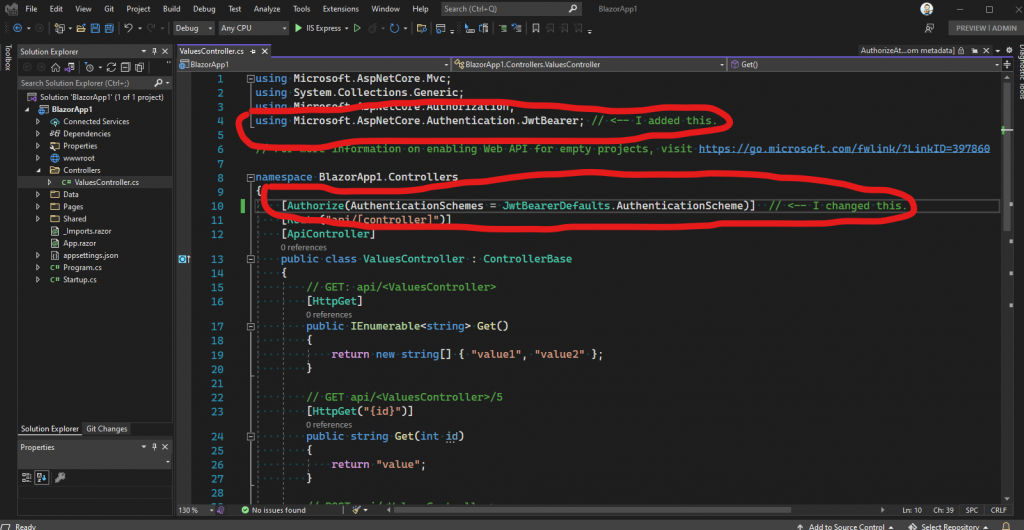
This time, we specified JwtBearerDefaults.AuthenticationScheme in the attribute, for the AuthenticationSchemes property, which if you’ll recall, was the name of the authentication scheme we registered in the Startup class. This is how .NET knows to look for a JWT token, a “bearer” token, in any incoming requests for this controller.
Keep in mind, since we only have the one type of authentication in our application, it really doesn’t matter whether we add the AuthenticationSchemes bit, or not. It only becomes important if we add another type of authentication to our application, later. If we did that though, then our controller would break and we would wonder why. This way, you are forewarned.
Let’s prove to ourselves that everything is working. Let’s run the application again, and once again, let’s add the “/api/values” to the URL, in the browser:
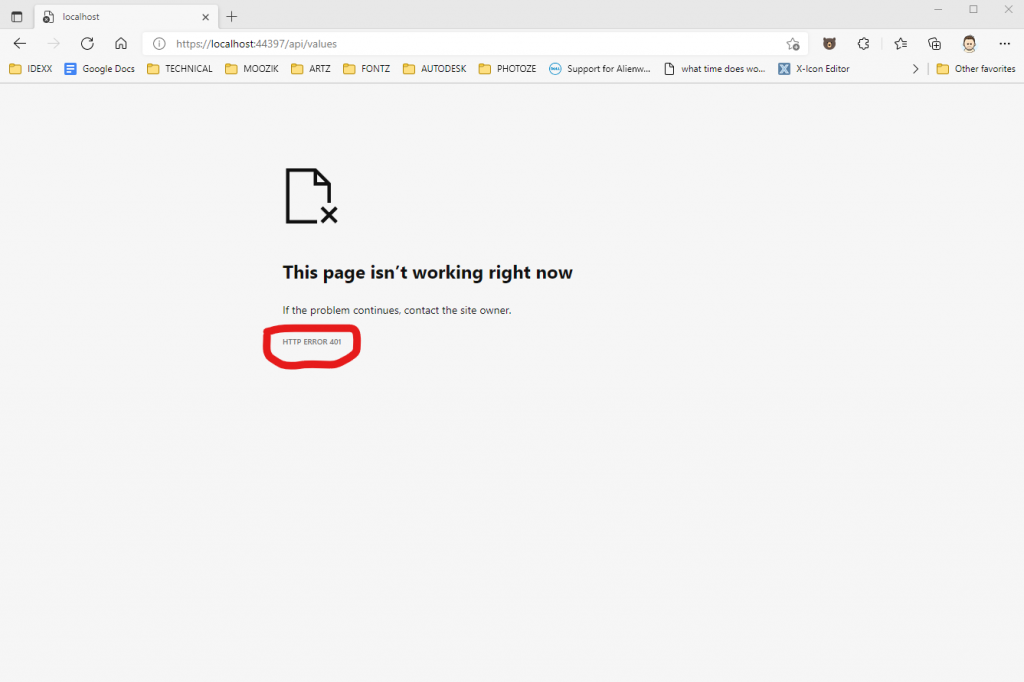
See the 401 error? That means we are no longer authorized to hit this REST endpoint. That’s good though! It means our controller is authenticating our incoming requests!
But wait! So, how do we use a JWT, or Bearer, or whatever token to get access to our controller? That’s a good question! After all, we’ll need the ability to generate a token and get it to our authenticated callers, right?
For this next step, we’re going to need another REST controller. This time, let’s call our new controller “AccountsController”. Go back and follow the steps we took, before, to create our first controller, except this time, name the new one “AccountsController”. It should look like this when you’re done:
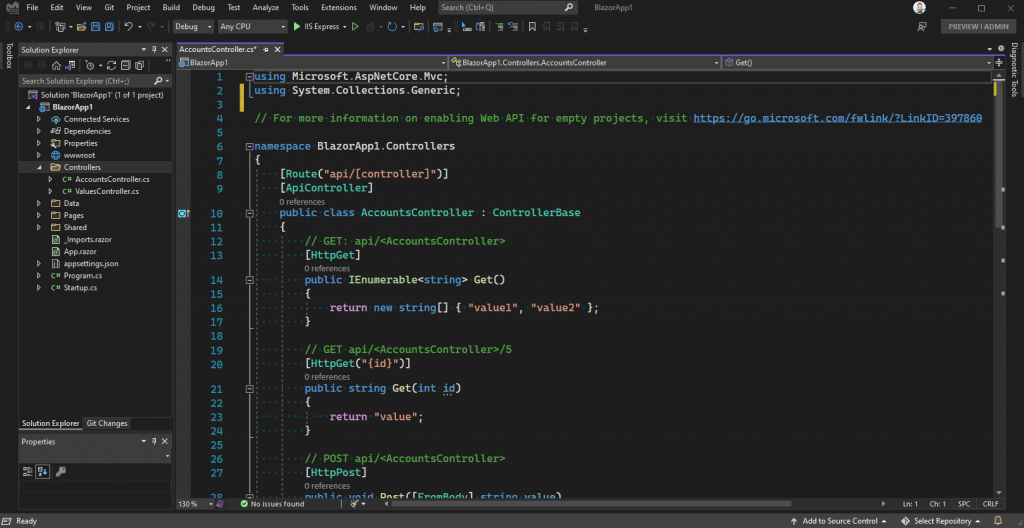
The only method we’re going to need, in this controller, is the Post method. You can either leave the other methods in there, or remove them. I’ll remove them from mine in order to keep everything clean:
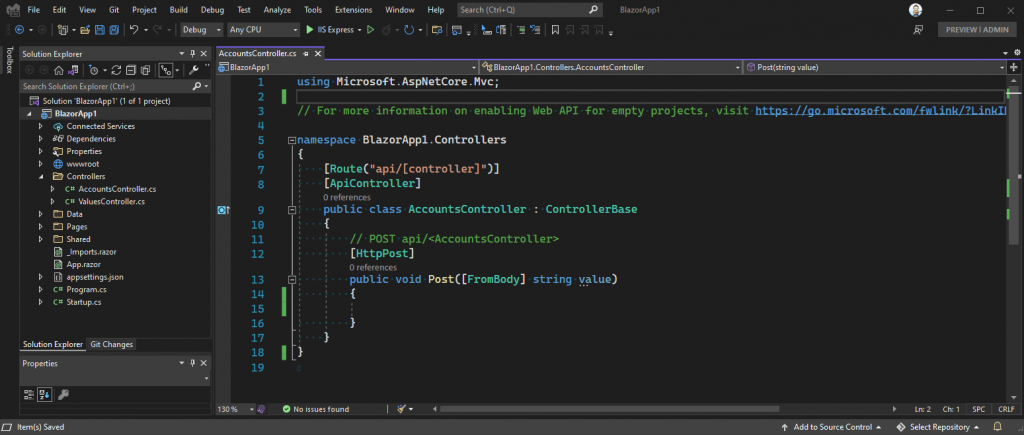
This will be the method we’ll use to login to our API. As part of that operation, we’ll generate a valid JWK token and pass it back to the caller. Let’s start by generating a small model to hold the credentials we’ll need for the login operation.
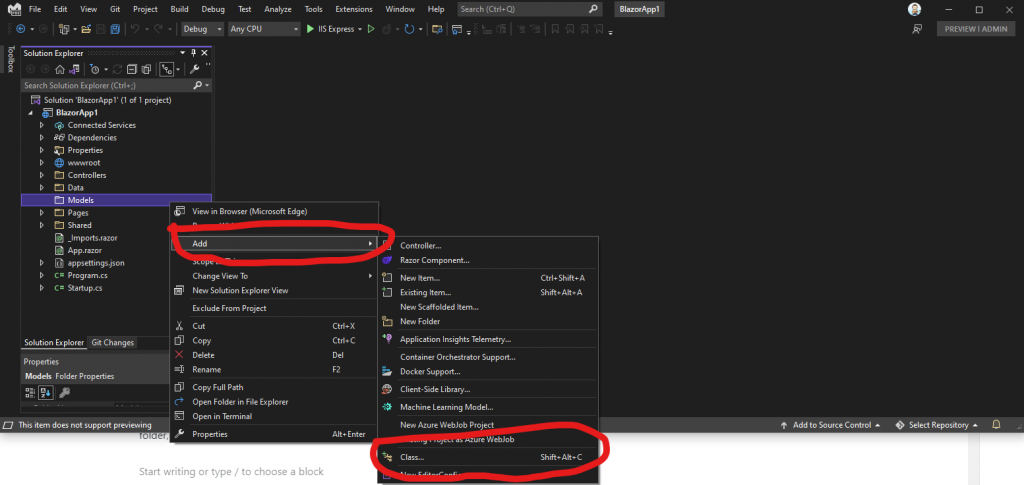
To do that, glance back at the steps we followed to create the Controller folder, and this time, create a folder called Models. Then, right click on the Models folder and create a new class:
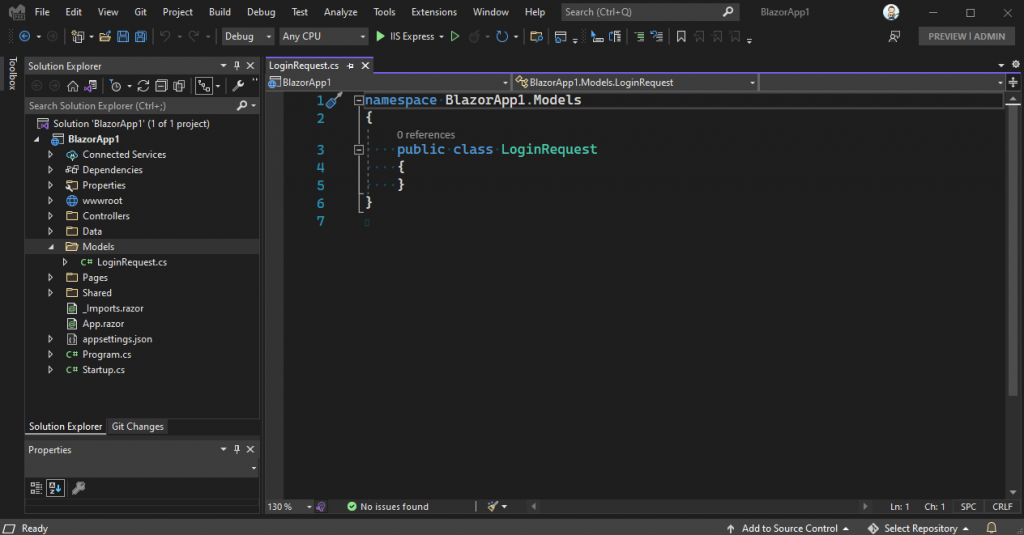
Next, name our new class LoginRequest.cs and press the “Add” button:

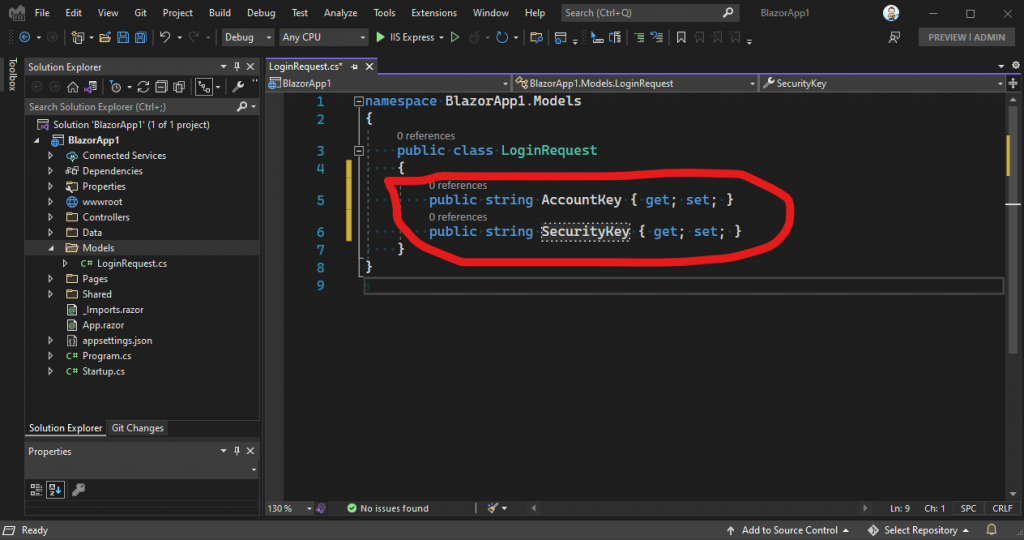
That creates a new class that looks like this:
Next, we need to add a couple of parameters to this class, for our login credentials. Now, those credentials could by something like a security key, or a user name, or anything you like, really – use whatever makes sense for you. For this article, we’ll add a security key and an account key:
The next step is to go back to our AccountsController class, and modify the parameter for our Post method:
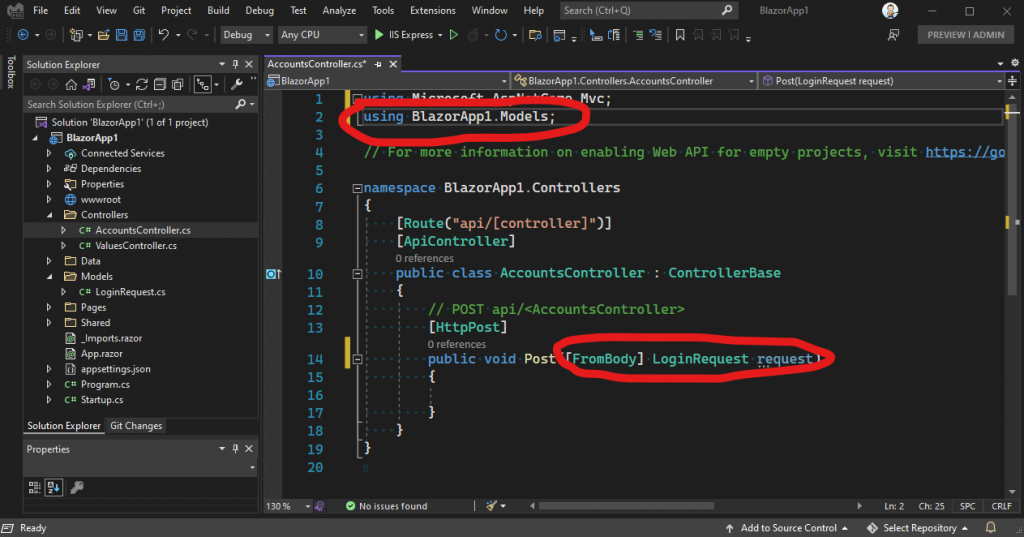
This means our login controller will accept these properties during our login operation. For now, we’ll add some quick hard coded checks for the values. Of course, in a production application you would want to check the credentials against your database:

Let’s talk about what this code is doing. First of all, I added the string “Login” to the HttpPost attribute, so we can call this method like this: /api/accounts/login. Next, I changed the return type of the method from void to IActionResult, so I could pass back either Ok, or Unauthorized – depending on whether the credentials are valid, or not.
Next, I do a quick check of the incoming credentials.
Next, I create a SymmetricSecurityKey object, which we’ll use to generate a signing key for our JWT token. Next, I create the signed credentials using an instance of SigningCredentials. Next, I create the token itself, passing in our signed credentials. Next, I create a token handler to convert our JWT token to clear text. When we’re done, the jwt variable holds a text representation of our JWT token. We then pass that back to the caller.
So now the question is, how do we test our new login method? My first reaction to a question like that is: “use postman!”. But, in this case, I’d rather keep everything inside our sample application. So, let’s double click the Index.razor page, in the Pages folder, and add some code:
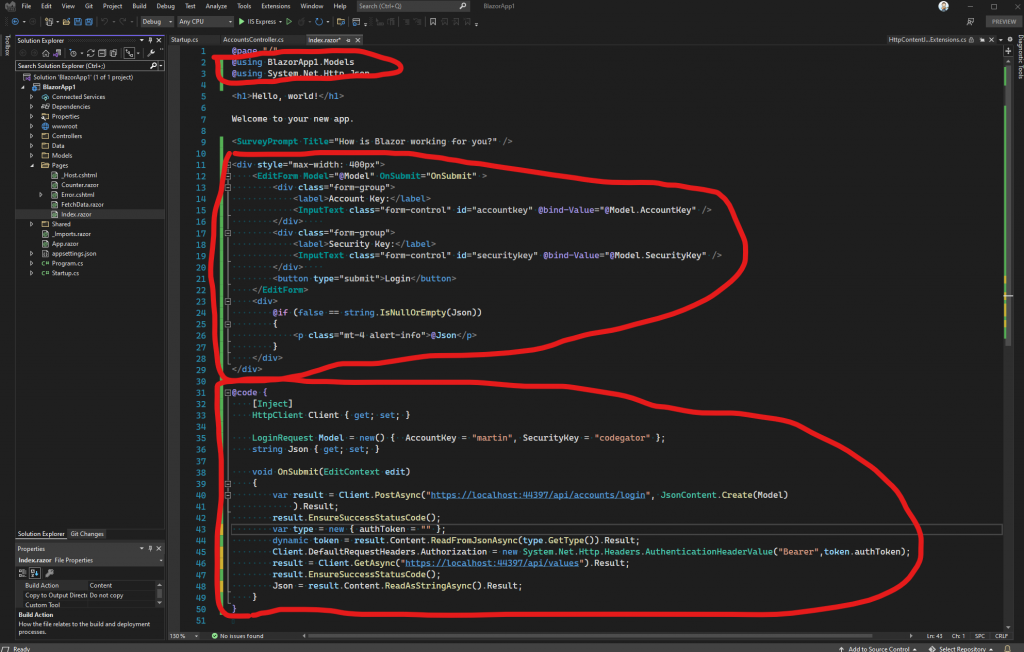
Let’s talk about this code. We need a form to post to our account controller, that will allow us to log into our new secure API. This code will do that.
We start by defining and edit form, in HTML, that binds to an instance of our LoginRequest class. Next, we bind the OnSubmit callback, from the EditForm, to our OnSubmit handler method.
Inside the OnSubmit handler, We post the Model property, which contains the instance of our LoginRequest object as the body of the POST. That, in turn, calls the Post method of our AccountsController class, thereby generating our JWT token and returning it with the response from the post operation. Next, we check to make sure the login operation succeeded with the call to the EnsureSuccessStatusCode method call. Next, we read the results of the post, which as we know, is actually our JWT token, from the login operation.
After we have the JWT token, we add it to the Client object, as the Authorization header. We do that because, as you’ll remember, our /api/values endpoint is secure and wants that token as part of any request.
Finally, we call our /api/values endpoint with the Client object, using the Authorization header that we created, that contains the JWT token from our AccountsController.Post method. We put the result of that call to a property called Json, which we display under the login form.
The login operation looks like this when we run it:
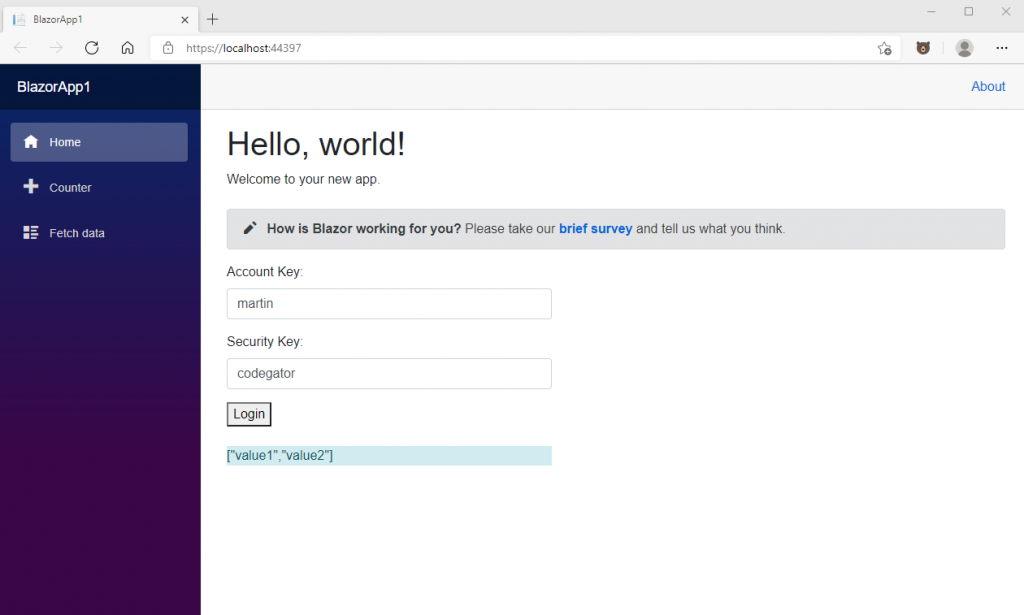
And that’s it! We have now demonstrated how to secure a REST API with JWT tokens (or Bearer, if you prefer), for a Blazor project. We have also demonstrated how to login to such a secure API. Finally, we have demonstrated how to add the JWT token to the HttpClient object, in order to call other secure endpoints on the API.
Feel free to download the code from HERE, build it yourself, set breakpoints, and verify that it does what I say it does.
Where to go from here? Well, this is a super simple explanation of a fairly complex topic. As such, it’s really more for learning than actually using on a production API. For instance, I hard coded the credential check in my AccountsController to keep things simple. You would absolutely want to query your live credentials against a database. Also, I haven’t touched on other, related topics, such as:
- The need to track failed login attempts, in order to prevent brute force hack attempts.
- The need to create new accounts, with contact information, such as an email address.
- The need to validate that email address, before access is given to the account.
- Possibly, the need to allow a user to change their password – assuming you used a user name / password for credentials.
There are other things, but you get the idea.
So why not just use the built-in ASP.NET authentication approach? Well, there’s certainly something to be said for that approach! For one thing, it works with a few clicks of the mouse. But, as they say, nothing is ever free. It turns out, that pre-built approach forces many choices on us, and those choices might not be right for all projects. For instance, the built in authentication code wants to stuff an EFCore data-context right there in our application’s project, and then tie that data-context directly to a live SQLServer database. If you don’t want the data-context in your application project, or you don’t want to use a SQLServer database, then that becomes problematic. Yes, you can go manually move the data-context out of your application project, but, Microsoft makes that far more difficult than it should be. And yes, you can roll a non-SQLServer data store, but again, Microsoft certainly doesn’t make that easy.
You can also use 3rd party libraries, like Identity Server, but, to me, those libraries are OMG too complicated and they also force a certain set of architectural assumptions on you, as soon as you reference the project.
You can also use cloud based services, like Auth0 and Azure, to do the same thing. Those kinds of services don’t force as much on a developer as, say, IdentityServer does, but you’ll still know they’re there, every day for the rest of your project. Also, with these kinds of services, your pocket book will know they’re there too, because you’ll be paying month to month for the privilege of using their service.
And that’s about all I have to say on this topic. For some projects, it might make sense to put together a quick and dirty JWT based authentication scheme for yourself. And now that you’ve read this article, you know how to do that!
Thanks for reading.
Photo by Erik Mclean on Unsplash